
Lists in Power Query are something many people know nothing about. Power Query uses them all the time even though you may not realize it, so if you add some List knowledge to your quiver, you’ll be able to kick your Power Query skills up a notch.
In my work, I often see the need for counting words, especially today with so much online data. Perhaps you want to ensure your Amazon product listings have a maximum number of words in the descriptions or you want to count the words in a podcast. The method I’m going to show you will count anything in your data, so you can apply this pattern to any of your datasets.

If you have done this in Excel, you know you need to use a long and somewhat cumbersome Franken-Formula stitched together with SUBSTITUTE, TRIM, and LEN. That logic doesn’t translate into Power Query at all, so we must take an entirely different approach, which is par for the course with Power Query. Don’t worry, it is easy to do once you understand how Power Query thinks. It does, however, require you to write a formula for it. You can’t just use the ribbon, and you don’t want to try translating Excel functions to Power Query language
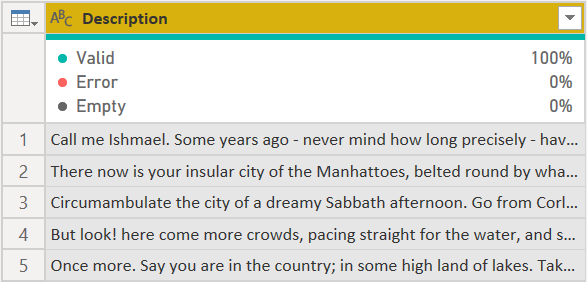
Let’s assume your data looks like the first few paragraphs from chapter 1 of Moby Dick:
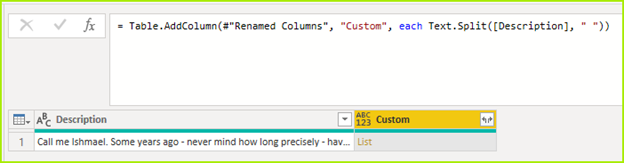
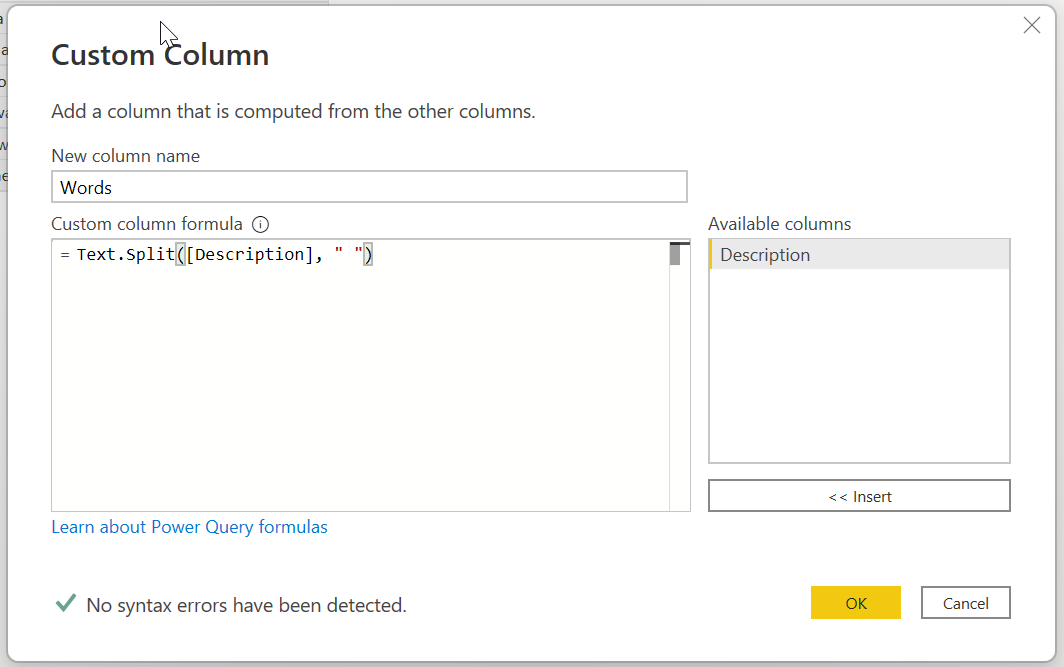
The first thing we want to do is split the [Description] field using a space as the delimiter. Turns out Power Query has a very simple function for this – Text.Split. So let’s add a new Custom Column with this formula:
=Text.Split([Description], " ")
To clarify, [Description] is the column name with the text we want to count and the space between the quotes is our delimiter.
This is where it gets interesting. Once you press ok, you have a new column with the word List for every item in the list. What is that?
As a point of clarification, a List in Power Query is simply a sequence of values. It isn’t a column, part of a table, or anything else. It is just, well, a list. As a quick example, if you were to create a Blank Query and simply type = {1, 2, 3} that is a list, and it would look like this:
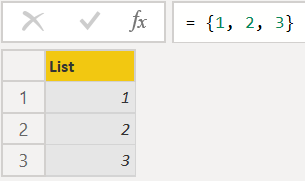
When manually creating a list, it must be in the curly brackets. Remember as we work through this, a list is not a column in a table. You can convert a list to a column or convert a column to a list, but a list is just a list. It can have as many items as you want, but it has no name. It is not a column called “List.” And there cannot be two lists side by side in a list.
Let’s get back to our example. We’ve added a custom column using Text.Split:
In English, the function above says “Take the contents of the [Description] field, and parse it at each occurrence of a space character, then return all of those pieces in a list.” This is what it looks like:
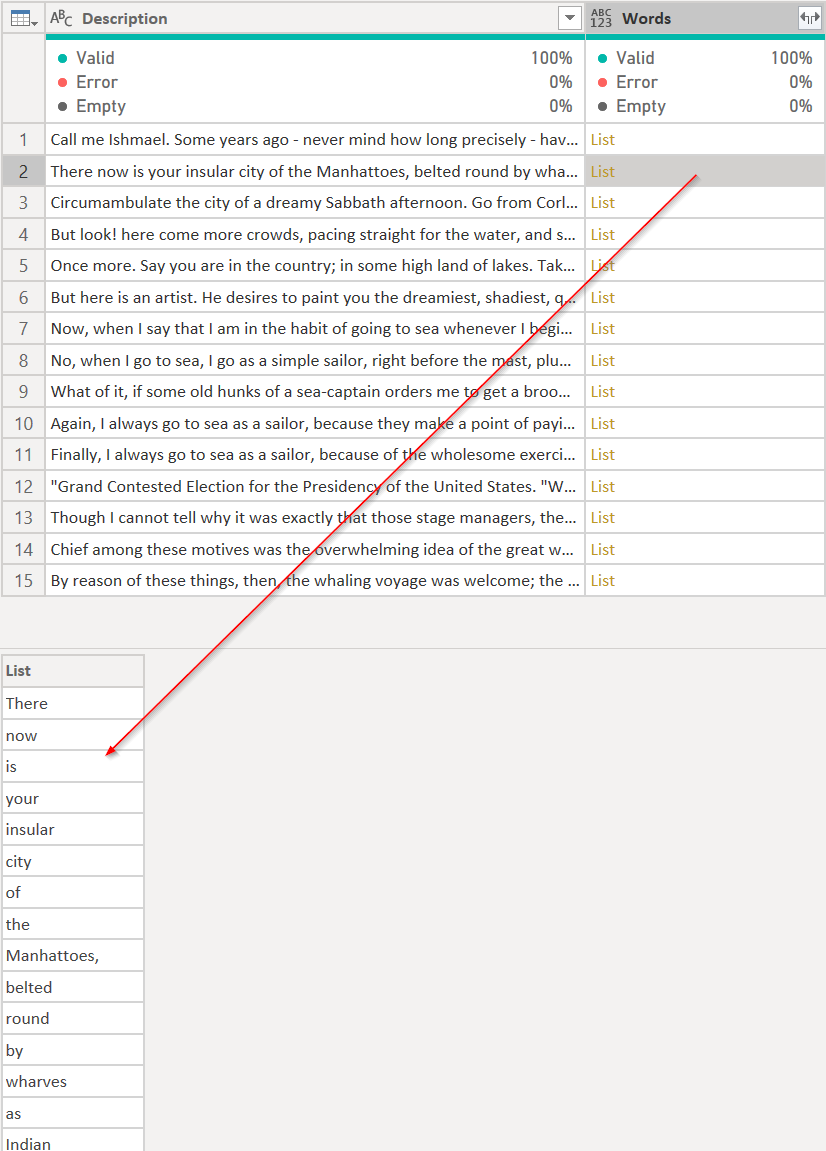
If you click on the white area next to the list, you will see the contents of the list in the bottom window in Power Query. Don’t click on the yellow word “List” as that will expand that list only. If you accidentally do click the yellow word “List”, just delete the most recent step in the Applied Steps windows.
In the window at the bottom of your screen, you will see the contents of the list. You probably only see a few words. I’ve expanded the window to show more. Each list in the table has the contents of that paragraph converted to a list with one word in each item of the list.
Power Query has dozens of functions that deal exclusively with lists, and many more that return a list, such as our new friend Text.Split. One of those functions is List.Count, and it does exactly what you think it does. List.Count({1, 2, 3}) will return 3 since there are three items in the list. You can see where we are going with this. We simply wrap our Text.Split function with List.Count.
Click on the little gear icon next to the custom column you entered that probably says “Added Custom” in the Applied Steps section and modify the formula. Wrap the Text.Split function with List.Count and press OK.
= List.Count(Text.Split([Description], " "))
This is what you’ll see now:
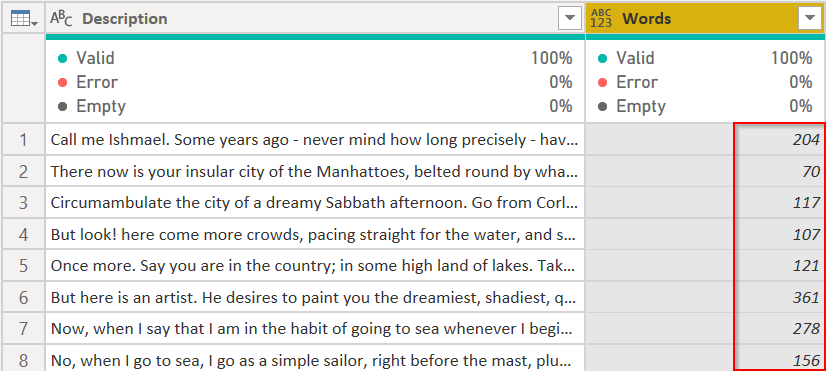
The first paragraph has 204 words, the second has 70, and so on. It is as simple as that. Now you would convert the data type of the Words column to Integer and do whatever analysis you wanted to in Power BI.
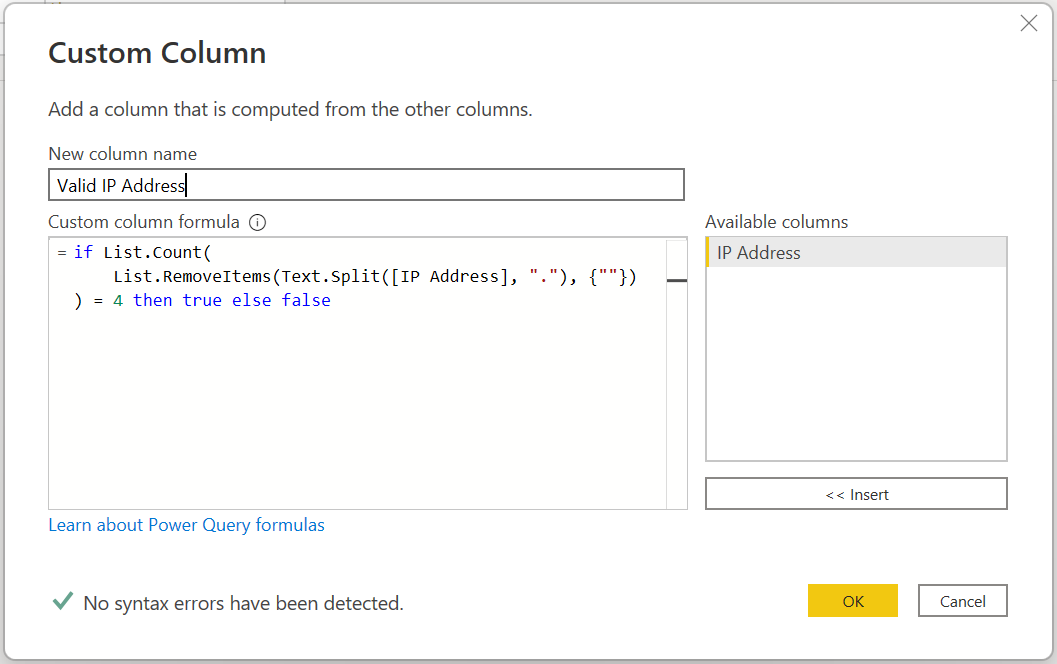
Hypothetically, you could also use this type of code to validate other data. Maybe you have a list of IP addresses and need to ensure they all have 4 sections, or octets. 123.123.123.123 would be valid, 123.123.123 would not. You’d could use this method to make sure there were 4 sections:
= if List.Count(Text.Split([IP Address], ".")) = 4 then true else false
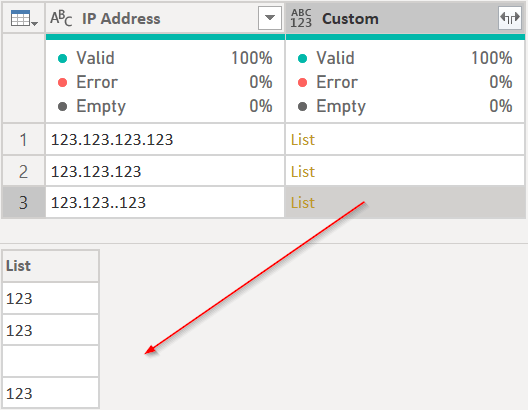
Let’s take it a step further. What if there was an address that was 123.123..123? What would the List.Count function return? It shows 4, and that isn’t right, because an IP address cannot have an empty value.
So how do we get rid of that? You’ll notice when you are in a list, many of the features in Power Query you might be accustomed to are not there. One is the filter button. If this were a table, we’d just filter it to remove the empty values. With a list though, we need to use a function for that. Power Query probably has more than 100 functions that create, manipulate, or convert lists, so the first thing to do is go to the Microsoft documentation for Lists and see if any meet our needs here. There are two that look promising:
- List.RemoveNulls
- List.RemoveItems
The easy thing to do is just wrap our Text.Split in this IP address example with List.RemoveNulls. That, however, will not work in this case. That blank item where the 3rd octet should be isn’t a null, it is called Empty, and is represented by two quotes next to each other – “”.
So the second choice, List.RemoveItems looks more promising since we can specify what we want to remove. So let’s try it. List.RemoveItems takes two arguments:
- The list you want to remove things from. This is simple. Text.Split returns that list for us, so that is the first list.
- The list of things we want to remove from the first list. We want to remove empty values from the list, so that is “” and we have to show that as a list, and recall the example very early on – lists can be manually created using the curly brackets, so {“”} is what we want here.
Therefore, our formula iteration is:
= List.RemoveItems(Text.Split([IP Address], "."), {""})
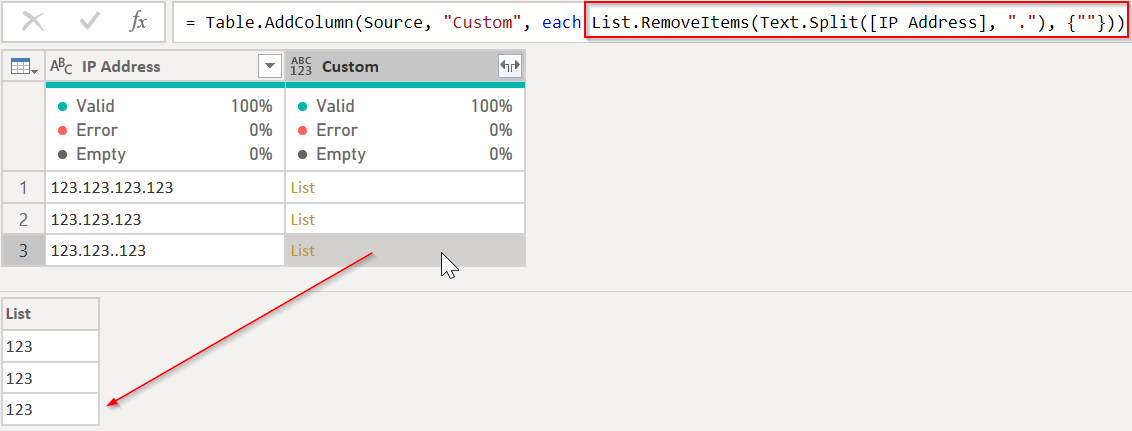
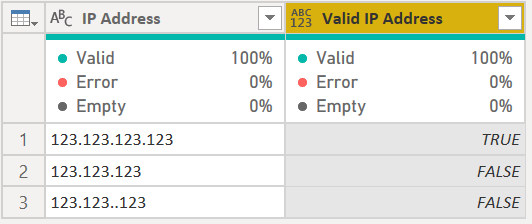
Finally, we can wrap that in List.Count and verify that all of the IP addresses have 4 segments.
Our resulting table would look like this.
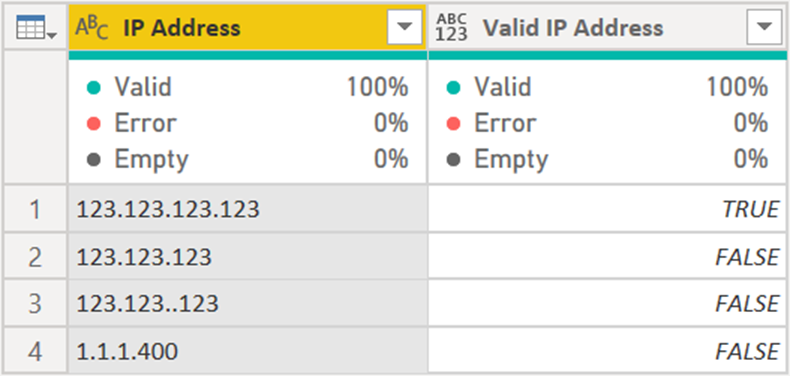
This concludes our brief introduction to List in Power Query. Wait, you have a question? What do you mean that example isn’t always going to return a valid IP address? Oh, because valid IP address octets must be between 0 and 255. Well, yeah, you’re right. There was no validation in that code. So, what if the data looks like this?

In that case, the code would need to be modified to check for valid parameters. Ladies and Gentlemen, I present to you The Real and Final Formula To Test For A Valid IP Address:
if
    List.Count(
        List.RemoveItems(
            List.Transform(Text.Split([IP Address], "."), Number.FromText),
            {"", null, 256..999}
        )
    ) = 4 then true else false
I’m not going to explain the full formula in detail, I’ll leave it to you to look how some of the functions I used work. However, here is a good overview, from the inside out:
- List.Transform takes the list that Text.Split provides and converts the text to numbers with the Number.FromText function.
- List.RemoveItems removes empty values, nulls, and any number from 256 through 999. Adding null to the list of items to remove was necessary because Number.FromText converts empty values to null.
- List.Count then counts the remaining list.
So the 1.1.1.400 becomes a list of {1, 1, 1} and is only 3 items. Therefore, with the new code, it returns false.
As you can see, lists can be very powerful when you learn how to manipulate them. They can take your Power Query transformation skills to the next level. Remember, though, that the Power BI data model doesn’t know anything about lists from Power Query, so you can only work with lists in Power Query, but don’t leave it in list form when your data loads. Do something with it. Sum it, count it, convert it to a column in a table, etc. (Hint: Not all functions that work with lists begin with List. Table.FromList for example, or even have List in the name, as you’ve seen with Text.Split)
And there you have it, a simple, elegant solution to counting words, IP Addresses, or anything else you may want to count and validate. What diabolical plans do you have that involve List?
Mixing logic in M takes a special talent. As this blog demonstrates, we at P3 Adaptive can work magic within both Power Query and DAX. If your organization needs that type of skill set to overcome the data-oriented challenges facing your business, we can bring a nimble toolset and a nimble mindset as well. Connect with the experts at P3 Adaptive for all your data needs.


Your email address will not be published.