
“Looks like it’s time for me to get myself a date.”
-Ace Ventura, PowerPivot Detective
The Importance of a Date/Calendar Table
I get a lot of questions from people who are struggling with the time intelligence functions in DAX. And nine times out of ten, the answer is that they don’t have a proper date table.
I know it’s tempting. You’ve got your sales table, and hey, there’s a Date column in there! So you use it, and pass that column as a parameter to, say, DATESBETWEEN, or DATEADD.
Sometimes that will give you an error. And other times, it won’t… but the results will be funky.
You need a separate Dates table, or perhaps you prefer to call it a Calendar table. A separate table, whose only purpose is to store dates (and the properties of dates, like DayOfWeek, etc.) And it contains consecutive dates – no “gaps.” Even if your business is never open on weekends, you need unbroken ranges of dates.
Oh, and then you need to relate it to your Sales table. (Or whatever fact/measure tables you have).
Much More Than a Single Column
A single-column table that contains merely dates is enough to make the time intelligence DAX functions operate smoothly. But you will almost certainly want other fields too. Like Year. MonthName. DayOfWeek. The list goes on.
Maybe something like this:

And yes, you can cobble this together on your own in Excel. Tedious work though.
Would You Like One for Free? Try DateStream from Boyan Penev!
Imagine just being able to open up PowerPivot and always having three nice date tables awaiting import:
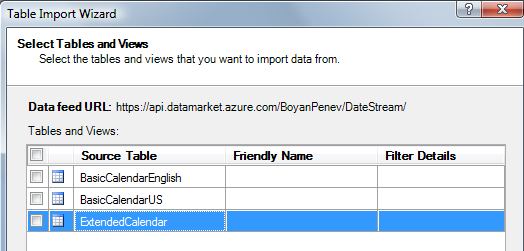
That’s what Boyan Penev has put together for you. Three great calendar tables that you can download directly into PowerPivot, for free.
He published them to Azure DataMarket, a service from Microsoft where data providers can actually sell you their data sets – things like weather, demographics, etc.
Boyan did this for free though – I suspect half as a service to the community, and half as a project to learn how to provide a service on DataMarket.
It’s pretty damn cool, and really, the story should end there. If you’ve used DataMarket before, then it DOES end there. Go get the date tables and try them out.
But if this is your first exposure to DataMarket, it takes a few minutes to get it set up. It’s not bad as long as you don’t make the mistakes I did.
How To Get It – Short Version
Hey, it’s on Azure DataMarket. The URL is in the next section below, or you can just go to Azure DataMarket and search on “DateStream.”
DataMarket is going to be a wonderful service someday, but right now it has a few warts, so there is a Long Version too.
How To Get It – Long Version with Occasional Snarky Commentary
Step 1: Go to the DateStream page on DataMarket [link removed due to 404].
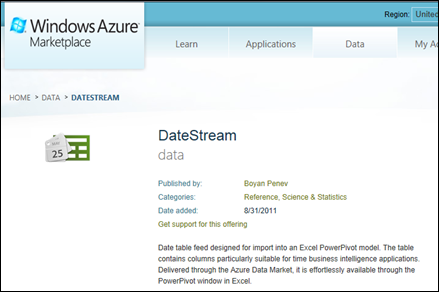
Step 2: Get confused. OK, now is where things get choppy, because frankly, the DataMarket site itself has a terrible user interface. I sent a full page of feedback to the DataMarket team about a month ago and as far as I can tell, they ignored it. (Which is pure karma – I used to be one of the people at MS who ignored 90% of the feedback coming in, and now I get to be the one who is ignored).
I don’t want this to be a tutorial on how to navigate their website, or even how NOT to design a website. So let’s just hit the highlights and try to get to Boyan’s date tables as soon as we can.
Step 3: Get an account. OK, this isn’t bad. Another MS site that requires a Live ID. Most of us have three of those by now.
Step 4a: Scan the DateStream page looking for the “Download to PowerPivot” button or link.
Yeah that’s right. There is no such link – you can get to one by navigating a few levels deeper but I’m going to skip that. Don’t despair though, good things await you!
Step 4: Find the URL of the DateStream Service
This is NOT the same as the URL of the DateStream page. But it IS displayed on the page. Here’s the URL you need:
https://api.datamarket.azure.com/BoyanPenev/DateStream/v1
OK, copy that. You will need it.
Step 5: Launch PowerPivot, Go Into the PowerPivot Window
And click this button:

If you don’t have that button, you need a newer version of PowerPivot. Go get that from PowerPivot.com and resume the next step.
Step 6: Fill in the Dataset URL From Step 5
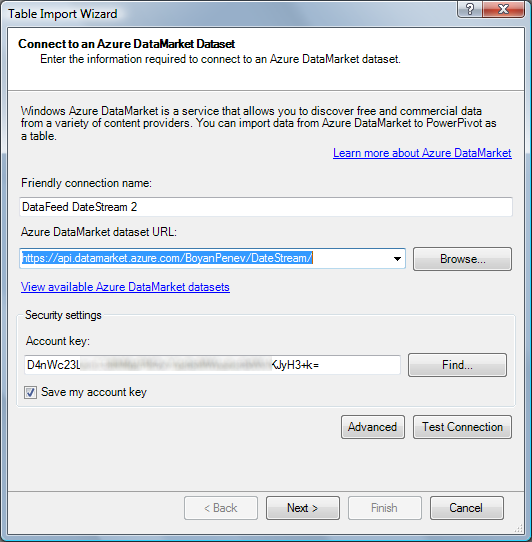
Step 7: Account Key
See that last text box in the picture above? The one with the long code in it that I’ve partly blurred? That’s my account key. I highly recommend clicking that Find button. It’s actually pretty damn useful.
Be careful – the DataMarket site has TWO long nasty codes like that for you. One of them is the one you want, and the Find button takes you to that one:
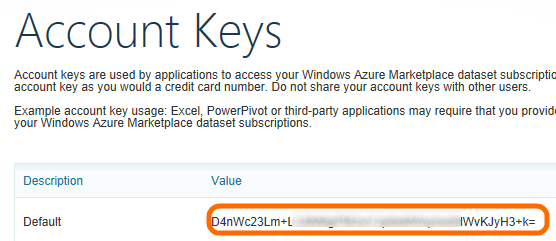
THIS is Your Account Key
Do NOT, under any circumstances, do what I did, and confuse Account Key with Customer ID:
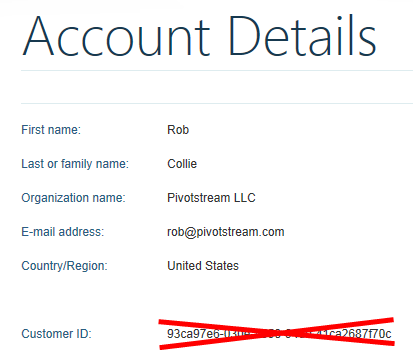
This is NOT Your Account Key.
Do NOT Be Tempted to Use This!
Step 8: Click Next, and Pick Your Table or Tables
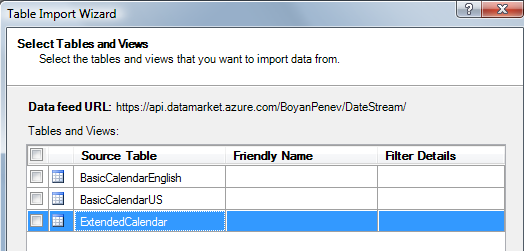
NOW we are on familiar ground.
Last Note: Parameterization?
One thing I have not yet figured out is how to limit the date range I import. The table starts in the year 1900, which goes back a bit far for my needs, and makes the dataset take a long time to download.
You’ll notice that when importing from DataMarket, the Preview and Filter UI lacks the filter dropdown buttons:

No Filter Dropdowns, Just Checkboxes
But the DateStream homepage DOES indicated that parameterization is possible:

So if you’ve got that figured out, drop me a note
Get in touch with a P3 team member