
What I didn’t know about the Power BI Service (PBIS):
I’ve been using the Power BI Service (PBIS) daily for five months, and before that, I consulted on challenging DAX problems for over a year. So, when I attended a Dashboard in a Day training put on by KnowledgeLake at my local Microsoft office, I didn’t expect to learn a lot, but I did hope to make some good contacts with fellow data wranglers in Kansas City. There was, however, one thing that surprised me: Get Data within the Power BI Service.
Note: This article requires the use of Power BI Pro, Office 365, and SharePoint Online (it’s ok if SharePoint on premises is your main intranet).
Get Data (Power BI Service) vs. Publish from Desktop
Publish from Desktop
There are two ways to get reports into the Power BI Service: (1) Publish in PBI Desktop, and (2) Get Data from Power BI Service. I have been relying on the first approach, publish. I would refresh locally, save my Power BI file, and then press the Publish button in the ribbon. And then I would wait as the report published on the service.
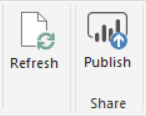
I used to use these buttons ALL the time. Now, not so much…
Get Data from Power BI Service
The second option is to save the file to OneDrive, or to a SharePoint team site, and then use Get Data to load the file. I confess I didn’t immediately grasp the benefits of this second method. But then I remembered something Krissy had mentioned to me about Power BI files sourced from SharePoint being automatically updated. I had been storing my files in a SharePoint team site, opening them, and publishing them to PBIS, but this doesn’t give you the benefit. To get the benefit of auto-updating, the SharePoint files must be sourced from PBIS via Get Data.
First, save your file to SharePoint
I prefer to sync my SharePoint folders and save to my local copy. But you could also upload them directly to SharePoint.
Start on the Reports tab of the Power BI workspace

The meaning of a button can change depending on where you are when you click it (Microsoft rules). If you have the Reports tab active when you click it, the Power BI file will upload as a Report. If not, it will upload as a dataset. Good to know!
Get Data; then click Files.
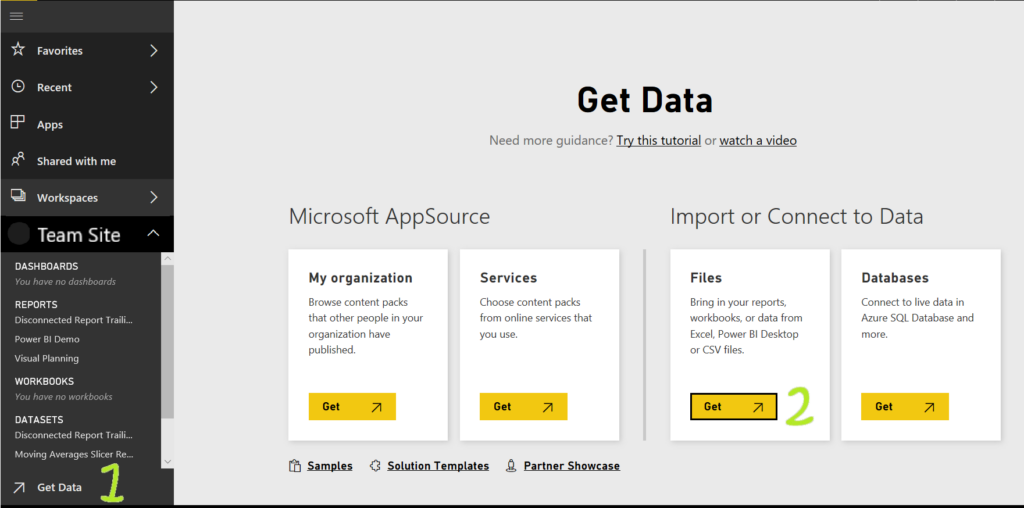
Next, click SharePoint Team Sites
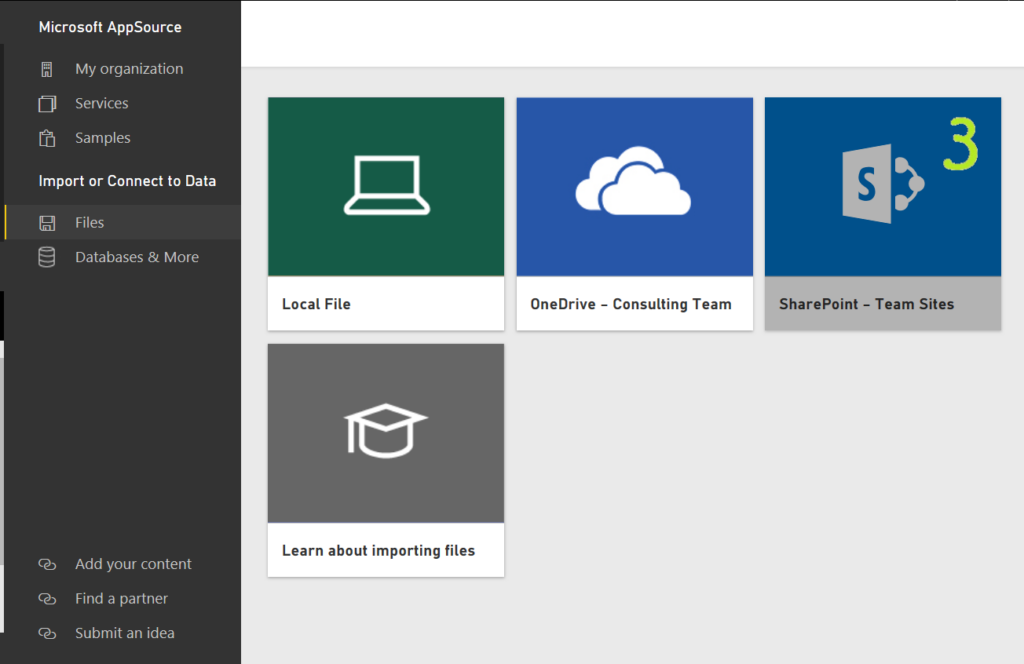
As you can see above, OneDrive can be used as an online source similarly.
Lastly, put in the team site URL

Now, it says you can click connect without a URL… but I recommend having the team site URL so you won’t have to hunt for the file.
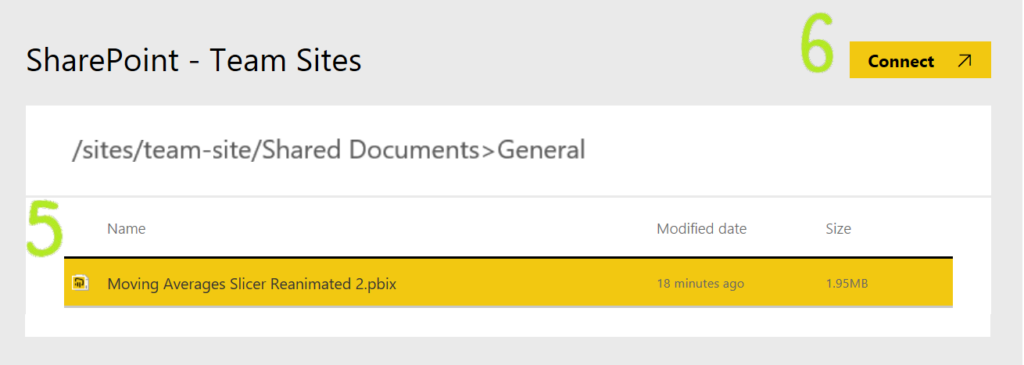
You then select your Power BI report and upload it to the service.
This is when the magic happens. The shared report on the Power BI Service will be updated whenever the original file on the team site is updated. AND, any SharePoint data sources in the file will also be automatically updated hourly as well.
Read the details from Microsoft here. The only thing I would add to the documentation is what I’ve shown above: how to source a report from SharePoint.
Keeping Reports in SharePoint Team Sites
I like to keep my Power BI source files in SharePoint team sites. It’s the logical place to look when someone else wants to review or update the report. And typically, the SharePoint team site has the same name as the Power BI app workspace. I set up the SharePoint site to sync with my local machine so that I don’t have to upload and download the file every time I make changes. Instead, I just edit and save the file. Syncing to the site happens automatically, and then the report in the workspace is also updated automatically (within an hour, but often just a few minutes).
SharePoint Online Versioning

SharePoint Online has built-in versioning to track changes in files. Click on the three dots menu as shown to view the version history. If there’s a problem with a recent version, you can restore a previous version. A copy of the selected version becomes the most recent version of the file. If you don’t notice a mistake immediately, versioning can save you from hours of fixing a report. One time, I merged in a new source, and it created duplicates. I also made other changes after that so when I discovered the problem; I was able to peel back the versions to discover the culprit.
Check out and Check in
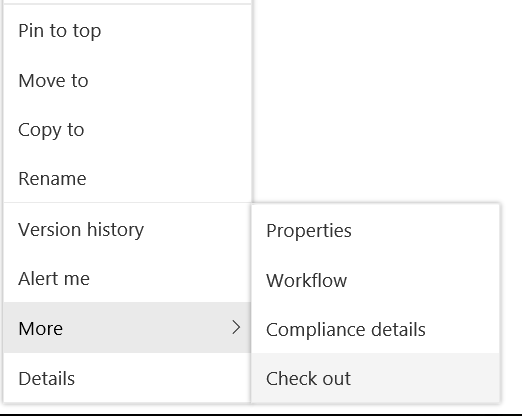
Hidden in the drop-down menu under More is the Check out option. Check out locks the file so that nobody else can save changes to the file. Combined with team communication, it can be useful in team environments. After a file is checked out, it can be checked back in.
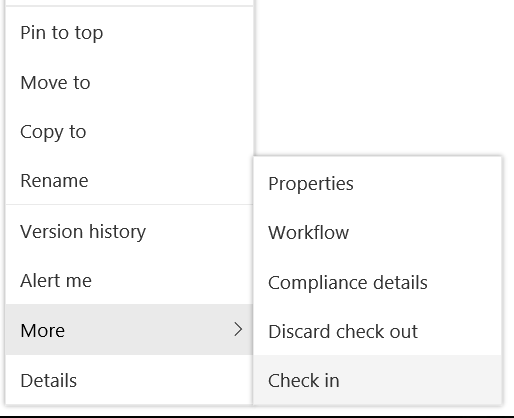
Check in is great, even in non-team environments. Why? Because it enables you to describe the changes made.

Sometimes, I’ll check out a file and check it in just to record the comment.
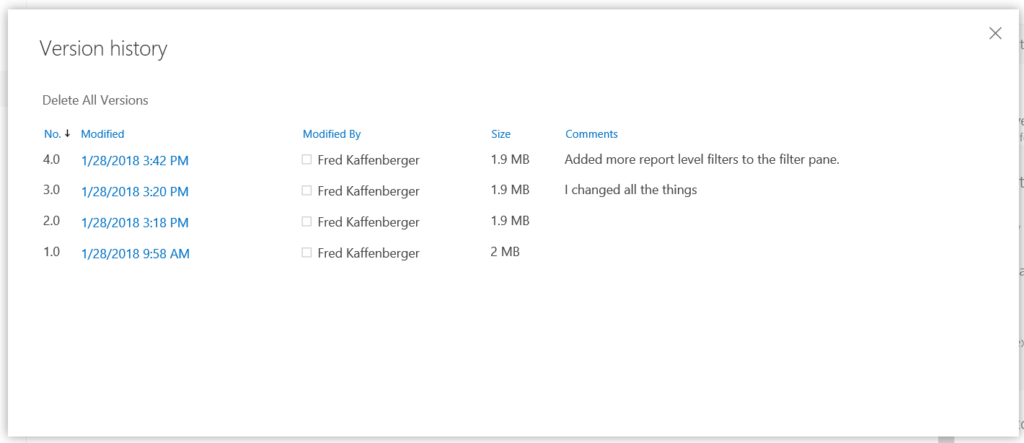
Making comments to document significant change makes versioning even more useful. You can quickly see which version you need.
Note: if you are saving your file locally and syncing, it takes a few minutes for changes to make it to SharePoint Online.
Publishing the workspace to the app
I use Workspace apps to make reports available to the users of the report. When publishing from Power BI Desktop, you can update the app immediately. When relying on the automatic update, you need to:
- Allow the local file to sync to SharePoint Online;
- Allow the report to update in the workspace;
- Manually refresh now or wait until the next scheduled data refresh to happen (make sure your credentials are valid, especially for SharePoint sources).
Once the app and the data are up to date, the app can be republished. Updating the app is a two-step process: 1. Update app and 2, Update app.
Step 1: Update app

Step 2: Update app

What else?
For more details on publishing apps in Power BI Service, see Microsoft’s documentation: Distribute to large audiences using Power BI apps. I also recommend SQL Chick’s Checklist for Finalizing a Model in Power BI Desktop. The checklist is focused on the model rather than the service, but it includes many crucial considerations that will impact a published report.
Human, and Tech*
We “give away” business-value-creating and escape-the-box-inspiring content like this article in part to show you that we’re not your average “tools” consulting firm. We’re sharp on the toolset for sure, but also on what makes businesses AND human beings “go.”
In three days’ time imagine what we can do for your bottom line. You should seriously consider finding out 🙂
* – unless, of course, you have two turntables and a microphone. We hear a lot of things are also located there.
Get in touch with a P3 team member