Hello P3 Adaptive Nation, welcome back to another exciting month of Power BI updates! This month’s release saw quite a few new updates and enhancements to the Power BI Universe. It’s like Christmas each month for us here at P3 Adaptive , where we get to open the latest updates article and see what the Microsoft Santa brought us this month. Data enthusiasts like us (and you!) can easily get swept up in all the bells and whistles features each month.
That’s where we come in. We’ll pass on to you our favorite new features each month. Before I discuss my favorite feature(s) this month, let me first give a nod to the honorable mention updates. One really useful update was the new DAX function COMBINEVALUES(). It’s a great move forward for Direct Query Models where multi-key relationships weren’t part of query folding previously…but now they can be! It’s also a great way to write a cleaner version of a nested CONCATENATE() DAX function. More about that feature can be read here.
Push The Button!
Alright, let’s get to the good stuff…namely the important feature(s) this month! Specifically, there’s been some really cool updates to the Bookmarks Feature. Bookmarks have been around for about half a year now and started out as a way to add a button that acted as a slicer macro. Every few months it kept getting cooler and cooler though! A few months later they added the ability for any bookmarks to show/hide objects in the report! In fact, we wrote an article in December that covered those features!

Fast forward to today, and they added another set of key features to Bookmarks.
The first one I want to discuss is the inclusion of built-in buttons. Now those of us who’ve been using bookmarks the last 3-6 months probably know that you’ve been able to add “buttons” with bookmarks since day one of its release. While that’s true, there were no button templates in Power BI Desktop. Most people found clever ways to make buttons in PowerPoint, Photoshop, or other image creation tool. It was EXTRA WORK to make them, plus it required some artistic talent, which not all of us have!
Thankfully Microsoft added a BUTTON button on the ribbon, making it MUCH easier to add them to a report. While it doesn’t include every type of button you’d potentially want to use when designing bookmarks, it certainly covers most of the bases.
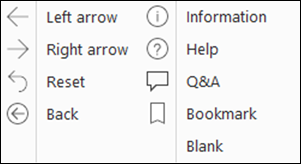
Most scenarios like navigation, information, or help are covered with the built-in buttons. The best part about these is that you can utilize them to make a Power BI report seem more and more like a webpage with pop-up windows, actions, and hidden parts!
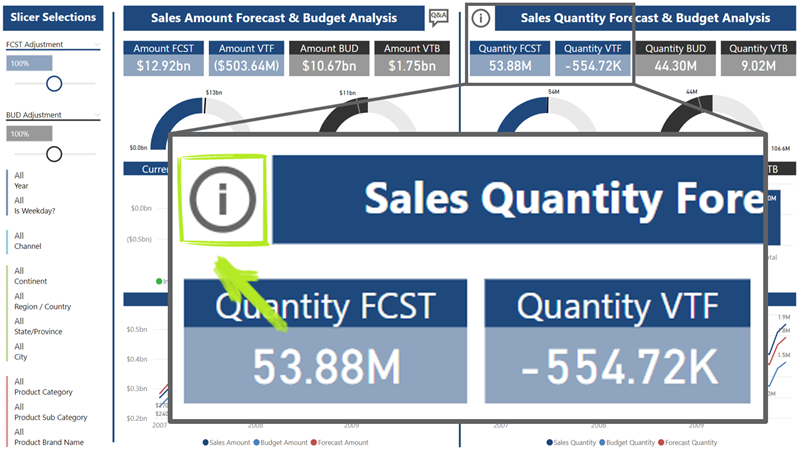
In fact, I’m going to show you how to utilize the new button feature to add an information pop-up window. Imagine a scenario where you’d want to include some information, glossary, instructions, or other miscellanies text in a report. Historically, I’d put that on a secondary Information / Glossary page. Otherwise, it’d take up TOO MUCH ROOM on my report! However, with Bookmark buttons, you can create a small button to show/hide an information pop-up window!
Example Report with an information button (Zoomed Image For Callout):
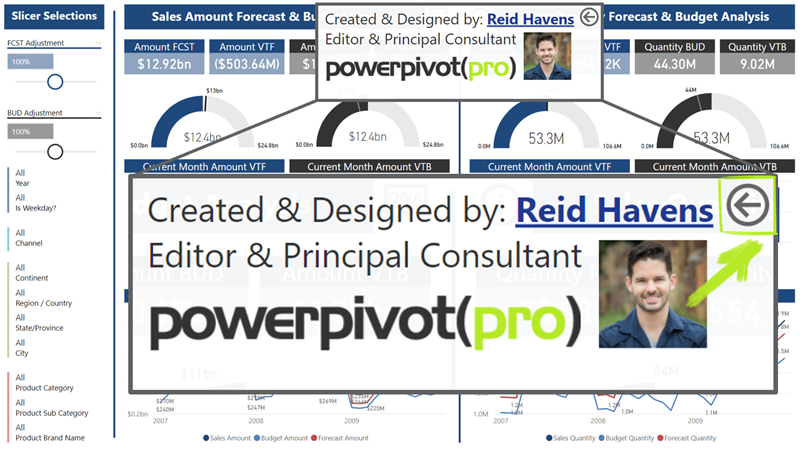
Clicking the information button brings up a text box, clicking the back button makes it hidden again (Zoomed Image For Callout):
Creating Your Own Pop-Up Window
It’s all well and good to see the result, but I know you want to see how to make it! So let’s get down to it. The first thing you’ll want to do is add the new information button on your page. Navigate to the button drop-down on the home ribbon and select the Information button. This will add a new button object to your page (see below).
Newly created information button:
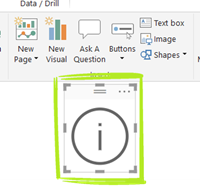
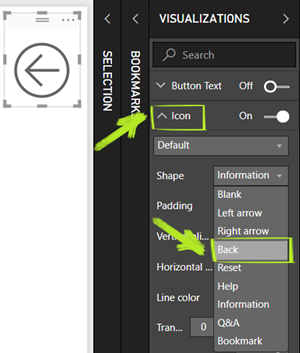
After you’ve created the information button, you can navigate to the View Ribbon to turn on the Bookmarks and Selection Pane. These will be needed to create the bookmarks for showing/hiding the information box that we’re creating. Next thing to do is to copy/paste the information button in the same spot where the current one is. When the text box is visible, this is going to be the back button! Also, the reason we’re copying/pasting is to ensure that the new button is the same size as the information button. To change to the back button, go the format settings on the newly copied icon, navigate to the Icon Settings, and change Shape to Back.
Changing the Icon from Information to Back:
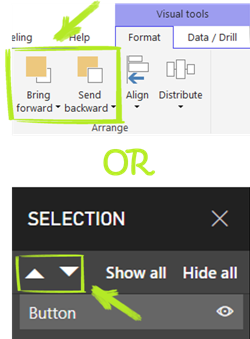
Now it’s IMPORTANT the order these buttons are in regarding which is in front vs. back. You don’t want objects to accidentally be on top or behind each other when designing this stuff. You can change the object order by A) selecting Bring Forward / Send Backward under Visual Tools Ribbon, or B) use the up/down arrow on the Selection Pane (see below for both).
Visual Tools Ribbon OR Selection Pane to access object order:
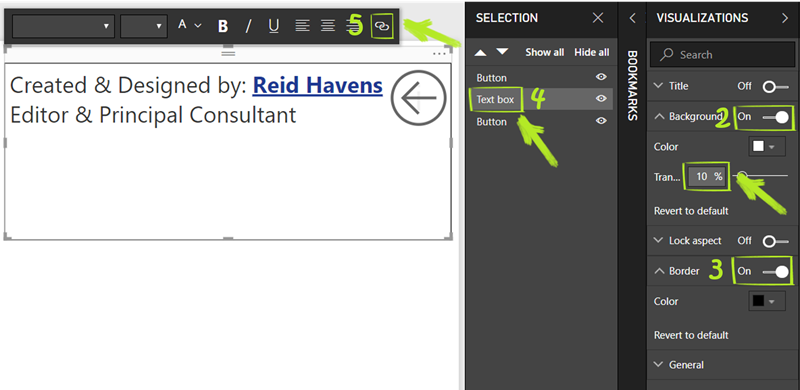
Next step will be to create the text box we’ll use to contain the information, glossary, etc.… There are a few steps involved in this one, so I’ll break it down as much as possible.
- Navigate to the home tab and add a new text box. The text box button is right next to the BUTTON button in the Insert section.
- In the text box options, turn on the background and set the transparency to 10%. The background color makes the text easier to read, and a slight transparency makes it seem MORE like a pop-up window! I typically just leave the color as White.
- Turn on Text Box Border
- MAKE SURE the text box is BELOW the back button on the Selection Pane! Otherwise, you’ll encounter issues if you ever click on the text box.
- Put any information you want in the text box. Added BONUS, you can hyperlink the text to a URL or Website too! I have my name link to the About Me page on p3adaptive.com
Text box setup instructions:
You can even add a bit of flare and put an image, company logo, etc… “inside” the pop-up window as well. For this example, I’ll go ahead and throw in a picture of yours truly, and the P3 Adaptive logo for good measure. The add image button is located right next to the Text Box button. Once both of those images are in there, I’ll now have something that looks like what you see below.
Example of the completed text box. Notice I made sure the back button is on top of the other objects in the Selection Pane:
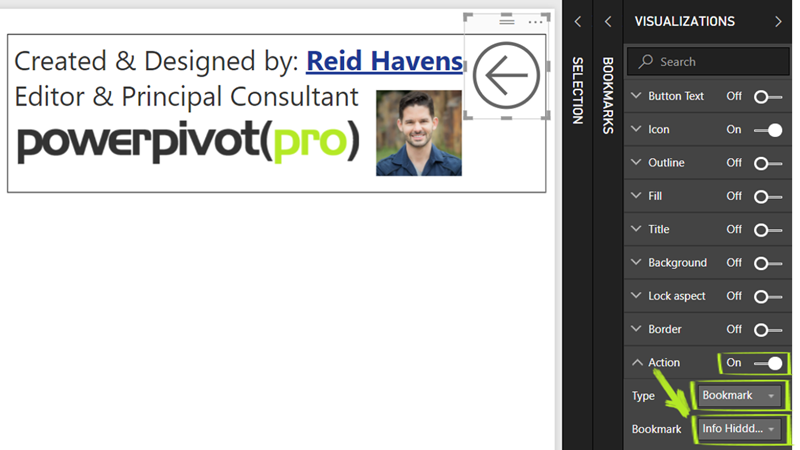
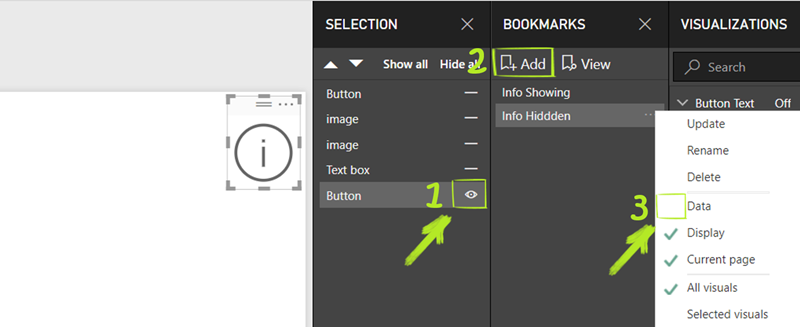
After we’ve added everything to our “pop-up window” we’ll need to setup the Bookmarks. As a refresher, bookmarks can control multiple things. They can control both Data (E.g., slicers, filters, etc…) AND they can control Display (E.g., things showing/hidden on the Selection Pane). Now what we want to do is create two bookmarks, one that will make the text box pop up, and one to make the text box disappear. Let’s start with the bookmark that will be used to make the text box pop up! Here are the steps below:
- First, hide the Information Button on the Selection Pane if our text box is visible (including the back button). We don’t want that other button showing in the background.
- Click Add on the Bookmarks Pane, and rename the Bookmark to something that mentions Info Showing.
- Make sure Data is NOT CHECKED! If checked, then it remembers your slicer/filter selection. We only want this bookmark to control what is visible.
Info Showing Bookmark setup instructions:

The Info Hidden Bookmark is the almost the exact same steps as above, except the Selection Pane is reversed. It’ll be the same steps 1 through 3, but the only object you want visible (of the objects associated with this pop-up window) is the Information Button. Here are the steps below:
- First, hide everything EXCEPT FOR the Information Button on the Selection Pane.
- Click Add on the Bookmarks Pane, and rename the Bookmark to something that mentions Info Hidden.
- Make sure Data is NOT CHECKED! If checked, then it remembers your slicer/filter selection. We only want this bookmark to control what is visible.
Info Hidden Bookmark setup instructions:
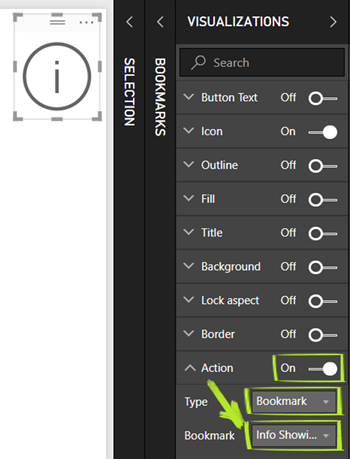
Now ALL that’s left, is to set up the buttons to associate them with the Bookmarks we just created! If you highlight the information button and then go to the Visualization Pane, there’s an option to set the Action. You’ll turn that on, set the type to Bookmark and set it to Info Showing. The same will be done to the Back Button, except that one will be set to Info Hidden. Once both are set up, you can test the way they’ll work once published, by holding the Control Key and clicking the buttons. It’s how they’ll work on Power BI.com, except when published you WON’T have to hold control.
Associating the Information Button with the Info Showing Bookmark:
Associating the Back Button with the Info Hidden Bookmark:

There you have it folks, your very own web-like pop-up window! Each time you a user clicks the Info Button, the pop-up window will appear, and clicking the back button will make it disappear…You can go ahead and add “web” designer to your LinkedIn now!
You’ll find the embedded Power BI report below. As with any of my reports, I love to throw in extra features in them. So if you’re curious about how I built the report, I’ve provided the article links to ALL the included features. Even better, now that we have these Bookmark Buttons I can include the links directly IN THE REPORT! Thanks for reading, and I’ll see you next time!
My Top 5 Power BI Practices: Transforming Good to GREAT: Article talks about a lot of the Formatting and Design Practices you see above, plus the DAX Formulas table.
Power BI: Transforming Good to GREAT: Video that is an updated discussion & walkthrough of the article above. Discusses Formatting, Design Practices, What If Scenarios, and Forecasting.
DAX Reanimator Series: Moving Averages Controlled by Slicer (Part 1): Article talks about the What If Scenario. Specifically, the FCST & BUD Adjustment Slicers in this articles report.
Using SELECTEDVALUES To Capture Slicer Selections: Article talks about the Slicer Selection Cards you see on the right side of the Tooltips page.
How To Connect One Slicer To All Your Power BI Reporting Pages: Article talks about the Slicer Landing Page I created, that filters other reporting pages.
Power BI Spotlight: New & Improved Tooltips: Article talks about the Mini Report Visual Tooltips.
Video Version of This Article Available
For anyone interested, here’s the video version of today’s post. I know some of you learn better by watching, rather than reading.
Did you find this article easier to understand than the average “tech” article?
We like to think that is no accident. We’re different. First of a new breed – the kind who can speak tech, biz, and human all at the same time.
Want this kind of readily-absorbable, human-oriented Power BI instruction for your team? Hire us for a private training at your facility, OR attend one of our public workshops!
Get in touch with a P3 team member